Drawing Text
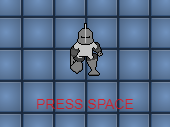
Placing a piece of text on the screen is very straight forward, you simply to need to specify the (x, y) coordinates if you are using the default canvas. The text will not appear at first and is instead wrote to an off screen buffer. You have to tell the engine that it is ready to be rendered, and also when to clear it.
// Move to (270, 300) and draw the text "PRESS SPACE" to the screen
rpgcode.drawText(270, 300, "PRESS SPACE");
rpgcode.renderNow();

// End the program when the spacebar is pressed
rpgcode.registerKeyDown("SPACE", function () {
   rpgcode.clearCanvas();
   rpgcode.endProgram();
}, false); // False here means the keyhandler should not live after this program has ended

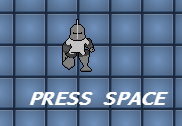
Changing the Color
You can change the color that the engine should use for drawing text at any time using rpgcode.setColor, which accepts an RGBA (Red, Green Blue, Alpha) value, where the alpha ranges from 0 (0%) to 1.0 (100%).
// Change the text to RED, and 75% alpha
rpgcode.setColor(255, 0, 0, 0.75);

// Move to (270, 300) and draw the text "PRESS SPACE" to the screen
rpgcode.drawText(270, 300, "PRESS SPACE");
rpgcode.renderNow();

// End the program when the spacebar is pressed
rpgcode.registerKeyDown("SPACE", function () {
   rpgcode.clearCanvas();
   rpgcode.endProgram();
}, false); // False here means the keyhandler should not live after this program has ended
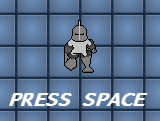
Changing the Font
You can change the font that the engine should use for drawing text at any time by setting rpgcode.font, you can either use a Web Safe Font, or any custom font asset that you have loaded into the engine.
// Set the font to be italic bold 20px
rpgcode.font = "italic bold 20px Lucida Console";

// Move to (270, 300) and draw the text "PRESS SPACE" to the screen
rpgcode.drawText(270, 300, "PRESS SPACE");
rpgcode.renderNow();

// End the program when the spacebar is pressed
rpgcode.registerKeyDown("SPACE", function () {
   rpgcode.clearCanvas();
   rpgcode.endProgram();
}, false); // False here means the keyhandler should not live after this program has ended
Centering the Font
In the last example you might notice that since we've changed the font size it is no longer centered beneath the player. This is because the dimensions of the font have changed, sometimes when drawing text you need to account for this. To fix it we can adjust the x location of the text by measuring it with rpgcode.measureText.
// Set the font to be italic bold 20px
rpgcode.font = "italic bold 20px Lucida Console";

// Get the dimensions of the text
var dimensions = rpgcode.measureText("PRESS SPACE");

// Adjust the x value a little based on the width
var x = 270 - (dimensions.width / 6);

// Move to (270, 300) and draw the text "PRESS SPACE" to the screen
rpgcode.drawText(x, 300, "PRESS SPACE");
rpgcode.renderNow();

// End the program when the spacebar is pressed
rpgcode.registerKeyDown("SPACE", function () {
   rpgcode.clearCanvas();
   rpgcode.endProgram();
}, false); // False here means the keyhandler should not live after this program has ended
Drawing Shapes
NOTE: For each of the draw functions there are also equivalent fill functions which act exactly the same only they draw solid shapes. See for example fillCircle, fillRect, and fillRoundedRect.
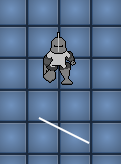
Drawing a Line
// Move to (300, 300) and draw a line to (350, 325)
// with a line width of 2
rpgcode.drawLine(300, 300, 350, 325, 2);
rpgcode.renderNow();

// End the program when the spacebar is pressed
rpgcode.registerKeyDown("SPACE", function () {
   rpgcode.clearCanvas();
   rpgcode.endProgram();
}, false); // False here means the keyhandler should not live after this program has ended
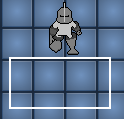
Drawing a Rectangle
// Move to (265, 270) and draw a rectangle
// 100 x 50 pixels width and height
// with a line width of 2 pixels
rpgcode.drawRect(265, 270, 100, 50, 2);
rpgcode.renderNow();

// End the program when the spacebar is pressed
rpgcode.registerKeyDown("SPACE", function () {
   rpgcode.clearCanvas();
   rpgcode.endProgram();
}, false); // False here means the keyhandler should not live after this program has ended
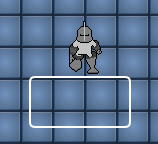
Drawing a Rounded Rectangle
// Move to (265, 270) and draw a rounded rectangle
// 100 x 50 pixels width and height
// with a line width of 2 pixels
// and corner radius of 5 pixels
rpgcode.drawRoundedRect(265, 270, 100, 50, 2, 5);
rpgcode.renderNow();

// End the program when the spacebar is pressed
rpgcode.registerKeyDown("SPACE", function () {
   rpgcode.clearCanvas();
   rpgcode.endProgram();
}, false); // False here means the keyhandler should not live after this program has ended
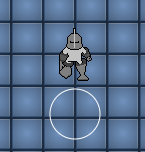
Drawing a Circle
// Move to (320, 300) and draw a cirlce
// with a radius of 25 pixels
rpgcode.drawCircle(320, 300, 25);
rpgcode.renderNow();

// End the program when the spacebar is pressed
rpgcode.registerKeyDown("SPACE", function () {
   rpgcode.clearCanvas();
   rpgcode.endProgram();
}, false); // False here means the keyhandler should not live after this program has ended
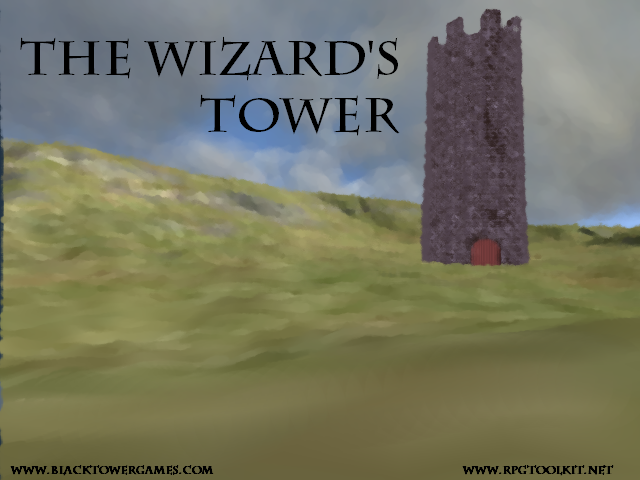
Drawing Images
IMPORTANT: Before you can use an image you must first ensure that it has been loaded into the engine using rpgcode.loadAssets, only then will it be usable in your programs.
Placing an image on the screen is also very straight forward, you simply to need to specify the (x, y) coordinates and the width and height of the image you want to draw by calling rpgcode.setImage. The image will not appear at first and is instead wrote to an off screen buffer. You have to tell the engine that it is ready to be rendered, and also when to clear it.
/*
 * Example of how to set an image on the default canvas and
 * render it to the screen.
 */

// Game assets used in this program
var assets = {
    "images": [
        "startscreen.png"
    ]
};

// Load up the assets we need
rpgcode.loadAssets(assets, function() {
   // Set the image onto the default canvas starting at (0, 0)
   // and extending up to (640, 480), with a rotation of 0
   rpgcode.drawImage("startscreen.png", 0, 0, 640, 480, 0);

   // Show the contents of the default canvas
   rpgcode.renderNow();

   // End the program when the spacebar is pressed
   rpgcode.registerKeyDown("SPACE", function () {
      rpgcode.clearCanvas();
      rpgcode.endProgram();
   }, false); // False here means the keyhandler should not live after this program has ended
});
Animating Images
IMPORTANT: Before you can use an image you must first ensure that it has been loaded into the engine using rpgcode.loadAssets, only then will it be usable in your programs.
Drawing static images is all well and good but sometimes we want them to appear more animated. We can achieve this by redrawing the screen at set intervals.
In the example code below we redraw the image every 10 milliseconds at its current (x, y) location. The user can change the x location at which it will be drawn with the left or right arrows keys. This is because we register UP and DOWN key listeners, that when triggered update the x location of the image.
/*
 * Example of how to move an image from left and right
 * on the screen.
 */

// Game assets used in this program
var assets = {
    "images": [
        "cure_orb.png"
    ]
};

// Load up the assets we need
rpgcode.loadAssets(assets, function() {

    // Declare starting position of the image
    var x = 0;
    var y = 0;

    // Store the state of the right and left key
    var rightDown = false;
    var leftDown = false;

    // Run the movement code every 10ms
    rpgcode.delay(10, function() {
        // Update the position of the image, if one of the keys is down
        if (rightDown) {
            x++; // Move right
        } else if (leftDown) {
            x--; // Move left
        }

        // Render the image at its current location
        rpgcode.clearCanvas();
        rpgcode.drawImage("cure_orb.png", x, y, 100, 100, 0);
        rpgcode.renderNow();
    }, true);


    // Listen to down and up events for the "RIGHT_ARROW" key
    rpgcode.registerKeyDown("RIGHT_ARROW", function() {
        rightDown = true;
    });
    rpgcode.registerKeyUp("RIGHT_ARROW", function() {
        rightDown = false;
    });

    // Listen to down and up events for the "LEFT_ARROW" key
    rpgcode.registerKeyDown("LEFT_ARROW", function() {
        leftDown = true;
    });
    rpgcode.registerKeyUp("LEFT_ARROW", function() {
        leftDown = false;
    });

});