Summary
In this part of the tutorial we will create a Tileset for use on our boards. A Tileset is a collection of smaller images broken up into a uniform grid of tiles. These tiles can then be placed on a board (i.e. a map) that our character can then explore. Tilesets can be made up of tile sizes ranging from 16 x 16 upto 128 x 128 pixels.
Steps
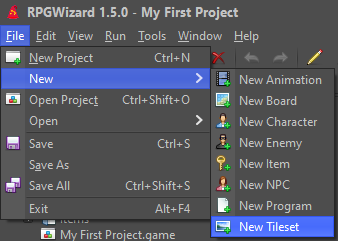
To create a tileset go to File > New > New Tileset.
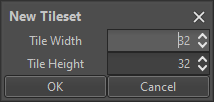
By default it is configured for grid made up of tiles 32x32 pixels. Sizes ranging from 16x16 (SNES era graphics) upto 128x128 pixels are supported. For this tutorial we will leave it at the default.
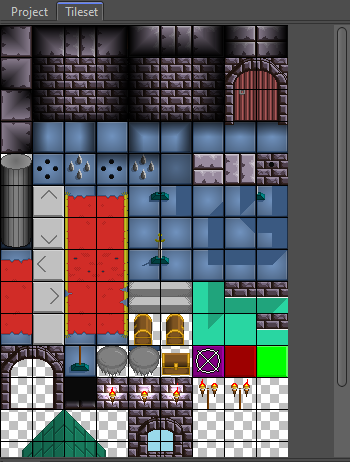
In the file dialog that appears go to Graphics and open the file "WTTileset.png", this is the image we will be using for our game boards. Select the image by clicking "Open", after which you will be prompted to save it as a Tileset.
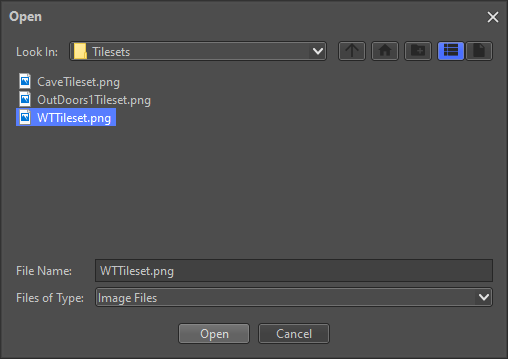
Tilesets use images from the Graphics folder so if you ever want to create a Tileset from a custom image it needs to be available in that folder.
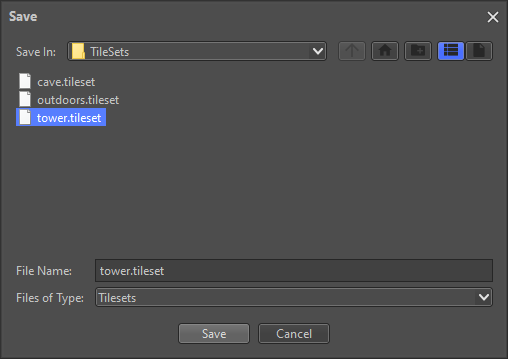
As soon as you save the Tileset it should appear in the "Tileset" pane in the top left of the editor. You can open as many Tilesets here as you like, and they can be closed by simply using a middle mouse click on the tab with its name.
If you bring your mouse into the Tileset you should see a faint blue cursor appear over the tiles, you can also click and drag to select regions of tiles from a Tileset.
Pro Tip: If you don't like the ordering of the tiles you can change the number per row by pressing the "-" or "+" sign on a num-pad will the tileset is selected.
Challenge
Google "Tileset 32x32" and download a suitable Tileset image. Then place it in your project's Graphics folder and try importing it.