Summary
In this part of the tutorial we will learn about RPGWizard animations, which are made up of several smaller frames from one large image. These are the building blocks for characters, enemies, NPCs, and will be needed to bring the character we create to life in the next part of this tutorial.
Steps
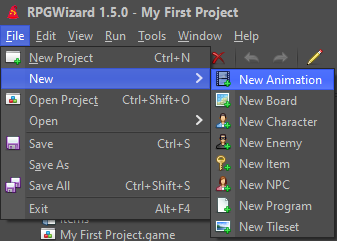
To create an animation go to File > New > New Animation. You will notice that there a several file types under the New menu, by the end of this tutorial series we will have introduced you to all of them.
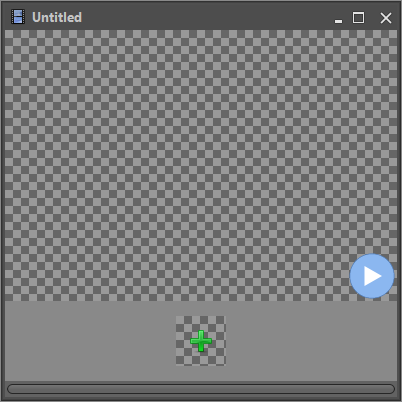
You will then be presented with the animation editor. This is the tool that builds an animation up from something called a Sprite Sheet, which is an image that is composed of many smaller images in a grid format. To setup the animation click "+" symbol at the bottom:
Setting the Sprite Sheet
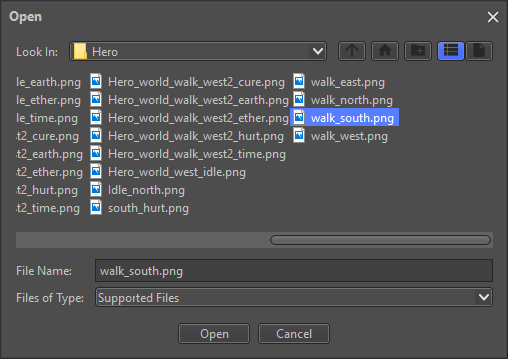
In the file dialog goto Graphics > Hero and open the file "walk_south.png", this will be our character's south walking sprite sheet.
NOTE: you will need to have copied the Graphics folder from the demo as detailed in the last tutorial for this image to show up.
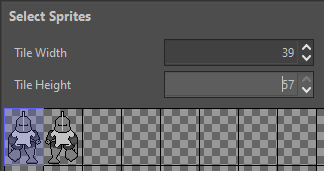
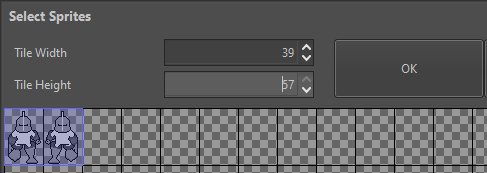
When you first set the image it will default to a 16x16 tile width and height, this doesn't match our sprite sheet so we need to adjust it. Set the tile width and height to 39 x 57 pixels:
Now we need to select the frames that we want to include in the animation, click on the first frame and drag it across until both are selected:
NOTE: For larger sprite sheets it is possible to select smaller parts of the image to use as an animation. This is useful if you have something like a complete character sheet.
Configuring Properties
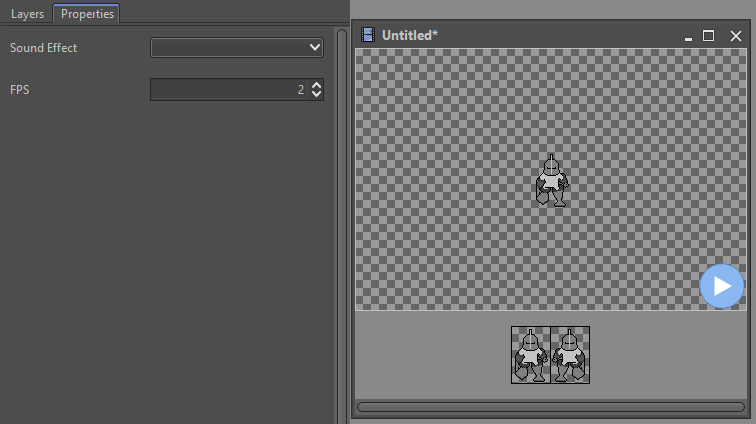
Now there is something we need to look at, in the bottom left of the main window you should see a tab titled "Properties". While you have the animation open switch to the this tab and you will notice a number of settings that can be configured:
- Sound Effect: Sound file to play during the animation (.mp3 or .wav).
- FPS: Number of frames to play per second.
For our character's walking animation we only have 2 frames from a sprite sheet that is 78 wide by 114 high, which gives us a width of 39x57 per frame. Go ahead and configure the properties as in the image below then click the play button for a preview of the animation:
Saving an Animation
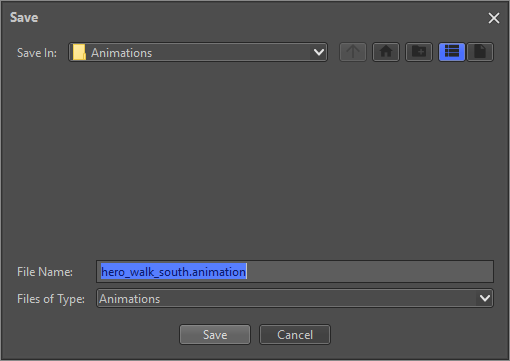
When you have finished experimenting save it with the name "hero_walk_south.animation":
Challenge
Repeat what you have learned to create another 3 animations for our character from the images walk_north.png, walk_east.png, and walk_west.png.