Summary
In this part of the tutorial we will be looking at adding solid board vectors. A solid board vector is a polygon that represents an impassable area or object. Up until this point in all your play testing you would have been able to walk through walls and pillars. Board vectors are what the RPGWizard uses for its collision detection and can be used to stop a character or an NPC from going somewhere they should not be able to.
Steps
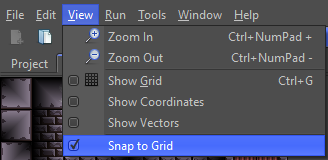
A board vector is made up of series of connected lines which can be drawn in area or free form mode, we'll be using the area version. For this tutorial we are going to snap them to a grid to make it easier for drawing the shapes we need, so go to View > Snap to Grid.
Now select the area vector tool from the main toolbar:

To start drawing a board vector simply left click and drag it to expand the area it covers. All vector drawing is controlled using the 3 mouse buttons which are:
- Left Click: Start drawing a vector from the mouse's (x, y) position to our next left click.
- Right Click: Stop drawing a vector, or select a vector if we aren't drawing one.
- Middle Click: Removes the selected vector from the board.
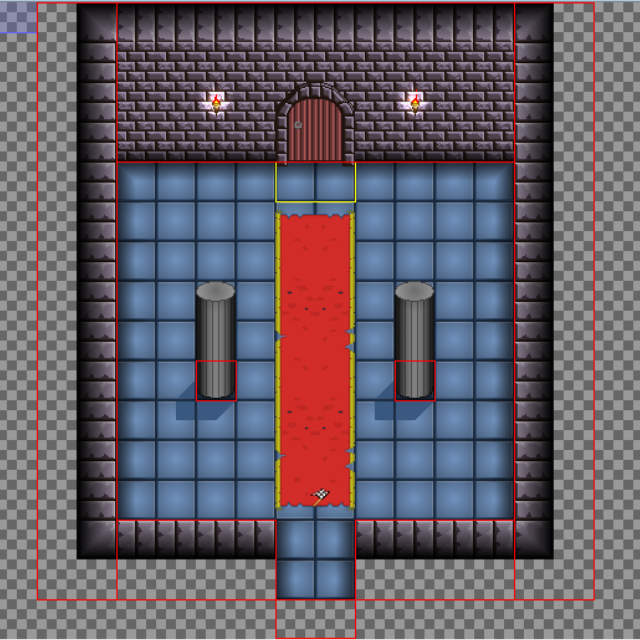
Now start by drawing a square around the base of the pillars, but make sure that you have the floor layer selected while doing this as board vectors exist on a per layer basis. This means your character can only collide with vectors on the same layer as them.

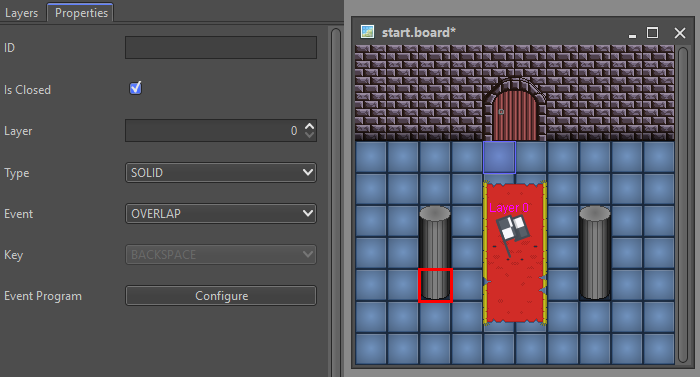
After you have drawn a square around the base of one of the pillars right click to finish it, then right click it again to select it. A selected board vector is visually thicker, when you have it selected switch to the properties tab.
Challenge
Finish off the vectors for the other pillar and walls. When you play your game you should no longer be able to pass through them.